Thursday, May 24, 2012

Closing a Chapter

After much thought, I have decided to close the Crazy Craft Bug chapter. It is getting too difficult to have two blogs and I have decided to dedicate myself to my couponing/money saving blog. Something that I need help with!

But never fear! I will keep the blog open so you can come and visit any time you like.

AND!

I will be posting about projects that I am creating over at


Ways to create and decorate on a limited budget!

I hope you all come over and join me there!

And be excited. Change is good!

Saturday, April 14, 2012

Additions

Good Evening blogland!

I am coming to you tonight courtesy of my new Notebook! My hubby believes in my writing career so much that he bought me this fun little computer!

I write. Did I mention that?

Anyways, I just wanted to let you know that I finally posted some homemade stuff in my Etsy shop. I have been making girls hair clips like crazy. I know I am having a boy but I love how fun these clips are to make.

Go check them out!


Wednesday, April 11, 2012

End of an Era

We had a very sad experience last night. I spent the morning over at my sisters with my kiddos so that my hubby could sleep, he is on the overnight shift this week.

I left there around 330pm and headed home. The hubby was up and I was sweeping the house. I went into my room and heard something. It sounded like a creepy heavy breathing man. To my dismay, I found our cat, heaving for air. Now, Oscar had been sounding funny for a day but I didn't think anything of it. This sounded much worse.

I quickly called the vet and we wisked him off to it. After much dileberation, the hubs and I decided that the best thing for us to do was to put him down. One of the hardest decisions I have ever had to make.

We have had Oscar for as long as we have been married, 6 years. He was a great mouse catcher and snuggler. He put up with the kids harrassment as well as the dogs. My husband kept saying that it was "The end of an era." (From FRIENDS)

So after tearful goodbyes, we watched our sweet kitty slip away and peace come over him.

It was a sad day.

Here he is all sweet.


Rest in Peace Oscar
We love and miss you!

Tuesday, April 10, 2012

Busy Bins: Water Toys

Good morning blog world. I hope everyone had a fantastic morning. Here is a glimpse into my morning:
630am: Isaac enters the room
Isaac: Mom, I poop
Mom: In your diaper?
Isaac: Yeah
Mom: Okay, go back to bed
Isaac reluctantly leaves
650am: Lucas enters the room
Lucas: Mom, Isaac pooped and it stinks
Mom: Go back to your room and leave me alone
Lucas: But mom! I can smell it
Mom: Out of my room
Lucas leaves
655am: Isaac screaming, Mom reluctantly gets up to find Isaac had stepped in his poop that had fallen out when he took his diaper out and Lucas was dressed in yellow rubber gloves which mom later found out, he was using to try and pick up the poop that had fallen on the floor.
700am: Mom is now desperately trying to clean the poop foot prints that are now all over their room while Isaac is in the tub waiting for a scrub down. Somewhere in her mind she is thinking "In all fairness, they did try to warn me."

Fun morning, huh. Wish you were here to experience it, huh.
No.
I didn't think so.

Anyways, with two boys and one on the way (yes, we are having another little crazy) I have been desperate to find things that keep the kiddos busy. Is it just me or are the toys in kid's room rarely played with?

I have seen the idea of busy bags all over blog land, which works great for toddlers but what do you do when they start to get older? So I decided to whip up some busy bins. I used the $1.00 bins from Walmart and filled them with lots of goodies.

The trick with these and keeping your kids interested in them is keeping them out of their reach. I only let the kids play with them at the table and they have to ask before they can go pick which bin they want. Then, after they are finished they have to clean it up before they get another one down. Lucas loves these, he calls them the "Fun Bins."

Anyways, one of the kids favorite bin is the Water Toy Bin. They love playing in the tub and this has all that in terms of fun but they play with it at the table. This keeps them entertained for about 45 minutes straight or until they start splashing water at each other and mom calls it quits for them.

Here is a break down of what I put in there:

All of these items were purchased from the Dollar Store
Blue Pebbles
Measuring Cups
Sponge Animals
Watering Can
Squeeze Toys

I got these dish washing bins from a local thrift store but you can get them cheap at Target or Walmart. I fill them with water, get out the Water Toy Bin and let them play. Oh, take off all their clothes and lay down a towel, water tends to get everywhere.

Here they are, happy as can be, playing in the water.

Happy boys, happy mom.

Now I can go and get some chores done or cook dinner and they are right there, enjoying their new "fun bin!"

Tuesday, April 3, 2012

My Cake Stand

Hello, hello blog land!

I hope everyones week is going well. Mine is good. Lots of projects going on at the same time but we do what we can!

Today I wanted to show you my cake stand.

Now, you know me, I hate paying full price for things. I would much rather hold out and get something great at the thrift store then run out and buy it new. I have been searching for months to find a great cake stand. But, sadly, I found none.

Then, as I was walking through a local thrift store it dawned on me, why not just make one myself? It couldn't be that hard.

So I found a candle holder that I thought would work great for about $1.50 and as I was going threw a consignment shop I found a wonderful glass plate on clearance for $4.00. I contemplated many different candle holders but I ended up with the original one that I bought.

Here is what I started with:
If you want to do this yourself, pick a candle holder that is pretty level and has no metal prong in the center. I wanted a big enough glass plate that would hold a good size cake. I thought that this one looked pretty good sized. Also, I was worried about the stability of it but after testing cake stands at the store, I found out that they really aren't incredibly sturdy (no I didn't break any.)

I then primed and painted the candle holder. There is a slight discoloration coming through the paint now so if I was to do it over again, I would have painted it a darker color. Then I applied a couple of coats of varnish. However, I would no recommend sticking this in the dishwasher, you never know what would happen to the paint.

The I bought a tube of super glue Gorilla Glue, found what I thought was the center and then glued it together.

Here is the final product!


I found the cake cover at a thrift store for $3.00 so all in all, I paid about $8.50 for the whole thing. And I LOVE it! I now sits proudly on my counter next to my newly painted wall!

I think it was totally worth it.

What have you been doing lately?

Friday, March 30, 2012

Bead Board Backsplash

So recently I finally convinced my husband to make a purchase for me.

It is something that I have wanted to get, desperately! Finally after much convincing, he agreed to let me buy said item.

And you know what it was?

A Jigsaw!

I have this very ugly wall in my kitchen. I mean, ugly doesn't describe it. The people who owned the house before us decided that they didn't like the cupboards above the bar so they decided to rip them down and then do some sheet rocking themselves. Bad idea.

It is just a horrible job that they did. So after two years, I was so sick of staring at it that I decided to do something about it.

Here it is:

Can you see the gigantic crack going down my wall. Yeah, the person who did this should definitely not quit their day job.

So I went out to Menards and bought a sheet of bead board and some glue and molding and got started. I am thinking I will write a tutorial about how to install bead board but that is to come. I went totally off of feel with this and learned quite a lot along the way.

Like, I didn't even need a jigsaw to do this project (although it works great for other projects I have started) and how molding becomes your best friend!

Well enough talking here is the final product. (My kitchen is complete, I plan on going all around but this was all I could get done it 2 days. Our poor kitchen was out of order during this transformation!)


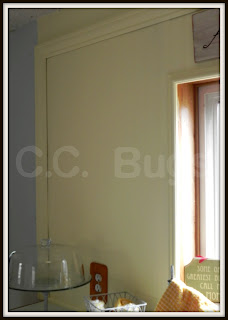
Ahhh, so much better and brighter!
I love this yellow color and it looks so good up!

It is hard to see that it is bead board, but trust me it's there.

And if you are wondering about the cake stand, fear not, I will be talking about that in posts to come!

What have you done lately?


Saturday, March 24, 2012

Boy's Dresser Redone

So you know how my blog is called Crazy Craft Bugs? Well, these week it came true. My life is officially crazy and is only going to get crazier!

We found out that pinks and browns are not in our future, the little squirt in my tummy has something down there and for those who can't make out what that means, we are having a BOY!

Yep, they just keep on coming. I am a little sad, but I love my boys and I am ready to welcome another one into our family. I am excited that they will hopefully grow up close.

I said to my husband while we were in the ultrasound, this is after the tech boldly stated to him "I guess you can't make girls!", that maybe our daughter will just be so rambunctious that she needs 3 brothers to keep her in line. Hopefully not.

But the good news is, we aren't done having kids, it just saddens me that I will have to go through another pregnancy to maybe get a girl. Pregnancy with older kids is just hard!

With that in mind, I have finally gotten around to showing you my latest furniture redo (OK, let's be honest, this was done like 3 months ago, I just haven't gotten around to posting about it, and that is mostly because I haven't taken it's picture!)

Here it is in all of it's glory.
I bought it at the local thrift store for I think $10.00, 25% off so really, $7.50.

The my lovely mother in law let me sand in her basement! Because it was freezing cold and snowy outside. I know, she is awesome!

So I sanded it, scraped the side paneling stuff off of one side of the dresser. It is the stuff that they put over the cheaper wood to make it look more expensive. It was warped and cracking too much on one side to I removed it, but on the other side I glued what I could with wood glue.

I also filled the holes with wood putty and any cracks.

After it was sanded, I primed it and the I painted it and then I varnished it.
Then I picked up some fabulous drawer pulls from the same thrift store for $3.00 for like 12 of them. That is an awesome price because at Menards, that is how much they are a piece!

After that was all done, I stepped back and admired it.

Oooo, it looked so much better! I used a mis-tint from Walmart and mixed it with some other paints to get this color.

Doesn't it look awesome in their room? I love it. The first dresser we have had for them in this room.

Fabulous!

What do you think?
Worth the $10.50 I spent?
I think so!